How to Cut a Passport Photo: A Guide to Sizing and Formatting
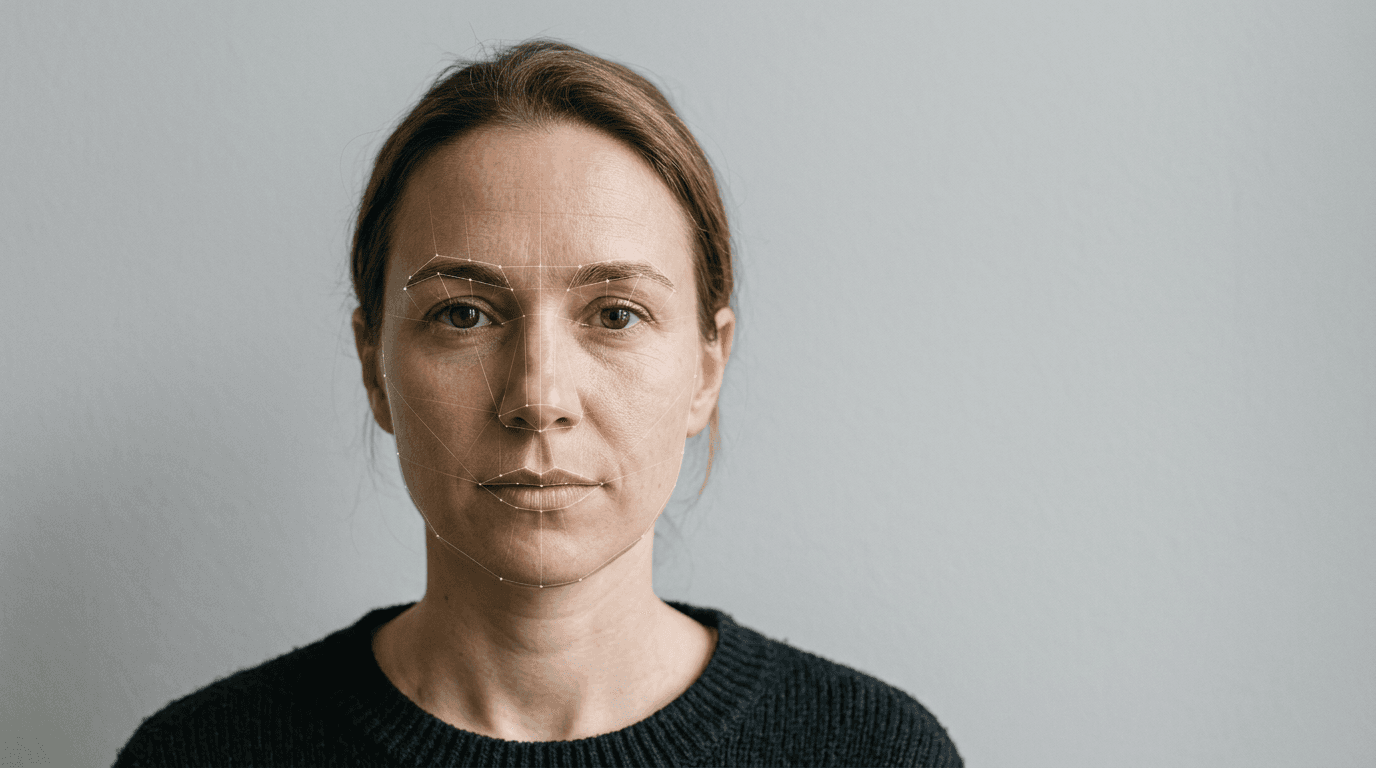
You upload the digital file to the portal, and the automated system rejects it instantly: the distance from the chin to the crown of the head is 28mm instead of the mandatory 29mm. What looked like a perfectly framed image fails because government processing software does not evaluate aesthetics; it measures biometric geometry against a strict mathematical template. When you decide to cut a passport photo yourself, you are not merely trimming away unwanted background. You are aligning a human face to a rigid schematic.
Quick Summary
Formatting your own identification image requires mapping the subject's facial features to exact biometric standards before cropping. This process ensures the file passes automated government checks and prints correctly without distortion.
- Determine the exact physical and pixel dimensions required by the issuing country.
- Map the crown-to-chin ratio and eye-line height before making any cuts.
- Set the correct resolution (DPI) to prevent pixelation during physical printing.
- Format the final image onto a standard template for cost-effective photo centre printing.
- Avoid post-processing filters that alter natural skin tones or introduce digital artifacts.
Table of Contents
- 1. Verify the Destination Country's Specifications
- 2. Prepare the Digital File Before Cropping
- 3. Map the Biometric Landmarks
- 4. Execute the Crop and Export
- 5. Arrange for Print or Digital Upload
- Common Pitfalls & Troubleshooting
- FAQ
- Recommended Reads
1. Verify the Destination Country's Specifications
Every issuing authority uses a different template for biometric scanning. Assuming a standard passport size exists across the globe is the most frequent cause of application delays. The United Kingdom requires a physical print measuring exactly 35 millimetres wide by 45 millimetres high. The United States demands a square 2-inch by 2-inch (51x51mm) format.

Before you alter the original image, you must identify whether the application requires a physical print or a digital file. Digital uploads introduce a second layer of specifications: pixel dimensions and file sizes. For example, a UK digital application requires an image of at least 600 pixels wide by 750 pixels high, with a file size between 50KB and 10MB. If you crop the image too tightly on your smartphone, you reduce the overall pixel count. When the system interpolates that reduced file to meet the minimum size, it introduces compression artifacts that cause the biometric scan to fail.
You must also verify the background colour requirement. The UK mandates a plain light grey or plain cream background, whereas the US strictly requires stark white. Understanding these rules early is critical because you cannot manually cut out the background later using software tools; automated systems detect edge manipulation and reject the file for tampering. If you are handling documentation for an infant, you should review the UK & International Baby Passport Photo Requirements & Guides to understand how these dimensions apply to a subject who cannot support their own head.
2. Prepare the Digital File Before Cropping
A common error is attempting to fix a badly lit photo during the cropping stage. Cropping only changes the geometry; it cannot salvage poor exposure. The raw image must be sharp, in focus, and free from red-eye. Look closely at the shadows on the face and behind the head. Biometric software uses shadow contrast to map the depth of the facial structure. If strong directional light casts a shadow across one side of the nose, the software reads the face as asymmetrical and rejects the image.
Ensure you are working with the original, uncompressed file directly from the camera or smartphone. Transferring the image via messaging applications often triggers aggressive compression algorithms that strip out the fine details necessary for biometric verification. Save the file locally to your device as a high-quality JPEG.
When evaluating the raw image, check the clearance around the subject. You need ample empty space above the head and across the shoulders. A photo taken with the face filling the entire frame cannot be corrected because there is no background to expand into. The software requires clear margins to anchor the biometric grid. If the subject's hair extends beyond the edge of the original frame, you must take a new photograph from further back. If you encounter issues matching the file requirements, consult the Help Center for technical troubleshooting.
3. Map the Biometric Landmarks
The core of the sizing process is mapping the facial features to the required grid. You are not placing the head in the centre of the rectangle; you are aligning specific points of the face to specific millimetre measurements.
For a standard UK 35x45mm photo, the most critical measurement is the distance from the bottom of the chin to the crown of the head. This measurement must fall precisely between 29 millimetres and 34 millimetres. The crown is defined as the top of the skull, not the top of the hair. If the subject has voluminous hair, you must estimate where the physical skull ends and measure from that point.
Next, evaluate the eye line. The eyes must be open, clearly visible, and positioned horizontally across the frame. There must be a specific amount of clearance above the crown to the top edge of the photo. If the crown touches the upper boundary, the system cannot verify the full head shape.
Practical rule: Always position the chin-to-crown measurement exactly in the middle of the allowable range (e.g., 31.5mm for a 29-34mm requirement) rather than aiming for the minimum or maximum, leaving a safety margin for slight printing variations.
Do not rotate the image to straighten a tilted head. The camera must be level at the time of capture. Rotating the image during editing creates unnatural angles in the shoulders and background lines that automated scanners flag as manipulated. If you need a reliable method for processing complex infant dimensions without manual mapping, consider using a dedicated UK Baby Passport Photo Maker.
4. Execute the Crop and Export
Lock your aspect ratio. Do this when cutting the image. If you are preparing a digital file, set the crop box to the exact pixel dimensions required by the government portal. Are you preparing an image for physical print? Set the crop tool to the physical dimensions (e.g., 35mm x 45mm). Also, ensure the resolution is set to exactly 300 Dots Per Inch (DPI).
Printing at a lower DPI results in a pixelated image that the passport office will reject for lacking sharpness. Printing at a higher DPI (like 600 or 1200) offers no benefit for a photo this small and can sometimes cause digital artifacts on standard photo printers.
Once the aspect ratio is locked, drag the crop box so the subject's nose sits exactly in the vertical centre line. Adjust the scale until the chin and crown fall within the mapped biometric zones established in the previous step. Ensure the shoulders are visible at the bottom of the frame.
Export the file as a standard JPEG. Do not use PNG, TIFF, or HEIC formats, as government upload portals routinely fail to process them. When saving the JPEG, select a high quality setting. Saving at maximum quality can bloat the file size beyond the portal's maximum limit, while dropping too low introduces visible blocky compression. The final file should look sharp when viewed at full scale on your monitor. Should your exported file fail the official checks despite your careful mapping, reviewing the 100% Refund Policy can clarify your options for recovery.
5. Arrange for Print or Digital Upload
If the application requires a digital upload, your file is now ready. The portal will run its own pre-check software, which should confirm that the biometric mapping aligns with their template.
If you need physical copies, you face a different challenge. Home printers rarely output the exact dimensions specified by the software due to margin scaling and paper feed tolerances. Instead, you must arrange the cropped image onto a standard photographic print size, such as a 4x6 inch (10x15cm) canvas.
Creating a passport photo page involves placing multiple copies of your 35x45mm image onto that 4x6 inch canvas, ensuring a generous white border remains around each copy. You can fit four to six identical images on a single standard photo sheet. This approach allows you to send the 4x6 file to any local pharmacy or photo centre, paying only pennies for a standard print rather than the heavy premium charged for official identity photos.
When the 4x6 sheet is printed, do not attempt to trim the individual images using standard household scissors. The uneven edges and slight bowing caused by scissor blades often lead to rejection. Instead, use a heavy-duty guillotine paper trimmer or a scalpel and metal ruler to execute straight, clean cuts along the borders of your carefully arranged layout. You can also generate your required passport size photo online using dedicated formatting platforms that automatically construct the 4x6 sheet layout for you.
Common Pitfalls & Troubleshooting
Even with precise mapping, digital images often fail official processing. These failures usually present identical error messages regarding 'biometric quality', but they stem from completely different root causes.
The 'Background Not Plain' Rejection
This occurs when the background contains faint shadows, textures from a wall, or a gradient where the light falls off toward the edges. It looks fine to the human eye, but the software reads the texture. The fix is not to cut out the background with an editing tool, which causes a 'manipulated image' rejection. The only fix is to retake the photo using a completely flat, matte surface with indirect lighting to eliminate all gradients.
The 'Image Resolution Too Low' Warning
This happens when you take a photo from too far away and crop heavily into the subject's face. The physical dimensions might be correct, but the pixel density within that 35x45mm box drops below the required 300 DPI threshold. The symptom is slight blurriness around the eyelashes when zoomed in. The fix is to retake the photograph closer to the subject, ensuring the head occupies more of the original sensor frame before any cropping occurs. This is the most frequent genuine cause of rejection.
The 'Incorrect Head Size' Error on Physical Prints
You mapped the file perfectly on the computer, but the passport office rejects the physical print for being the wrong size. This occurs because the photo centre's printing kiosk applied 'Fit to Page' or 'Borderless' scaling, which stretches the entire 4x6 layout by 2-3% to cover the paper edges. The fix is to reprint the sheet, explicitly instructing the kiosk or operator to print at '100% scale' or 'Actual Size' without altering the margins.
The 'Unnatural Skin Tone' Flag
Smartphone cameras automatically apply 'beauty filters', HDR processing, or AI colour balancing that alters the natural pigmentation of the skin. The software detects the lack of natural skin pores and flags the image as digitally altered. The fix is to disable all smart HDR and portrait modes in your camera settings before capturing the image, delivering a raw, unedited representation of the subject.
FAQ
Can I use an online tool to remove the background of my photo?
No. Government agencies explicitly forbid digitally altering the background. Automated software detects the unnatural pixel edges around the hair and shoulders, leading to immediate rejection. The background must be naturally plain at the time of capture.
Why did the online portal reject my correctly sized digital photo?
The file size may be too large or the image compression too heavy. Even if the pixel dimensions are correct, a file under 50KB or over 10MB will fail. Check your file properties and re-export the JPEG with an 80-90% quality setting.
How do I ensure the correct chin-to-crown measurement for a baby who cannot sit up?
Lay the infant flat on a plain light grey sheet and photograph from directly above. Do not attempt to prop the baby up with pillows, as the pillows will intrude into the background. Use the zoom function slightly to avoid casting your own shadow over the subject.
Is it better to print the photos at home or at a shop?
A photo shop is vastly superior. Standard inkjet home printers cannot replicate the continuous-tone output of commercial dye-sublimation printers, and the passport office frequently rejects home prints for visible ink dot patterns.
Can I wear glasses in my digital photo?
In the UK and US, glasses are not permitted in official identification photos under any circumstances, even if they are prescription lenses. They must be removed to prevent glare and frame obstruction of the eye sockets.