How to Meet Passport Photo Requirements for Global Compliance
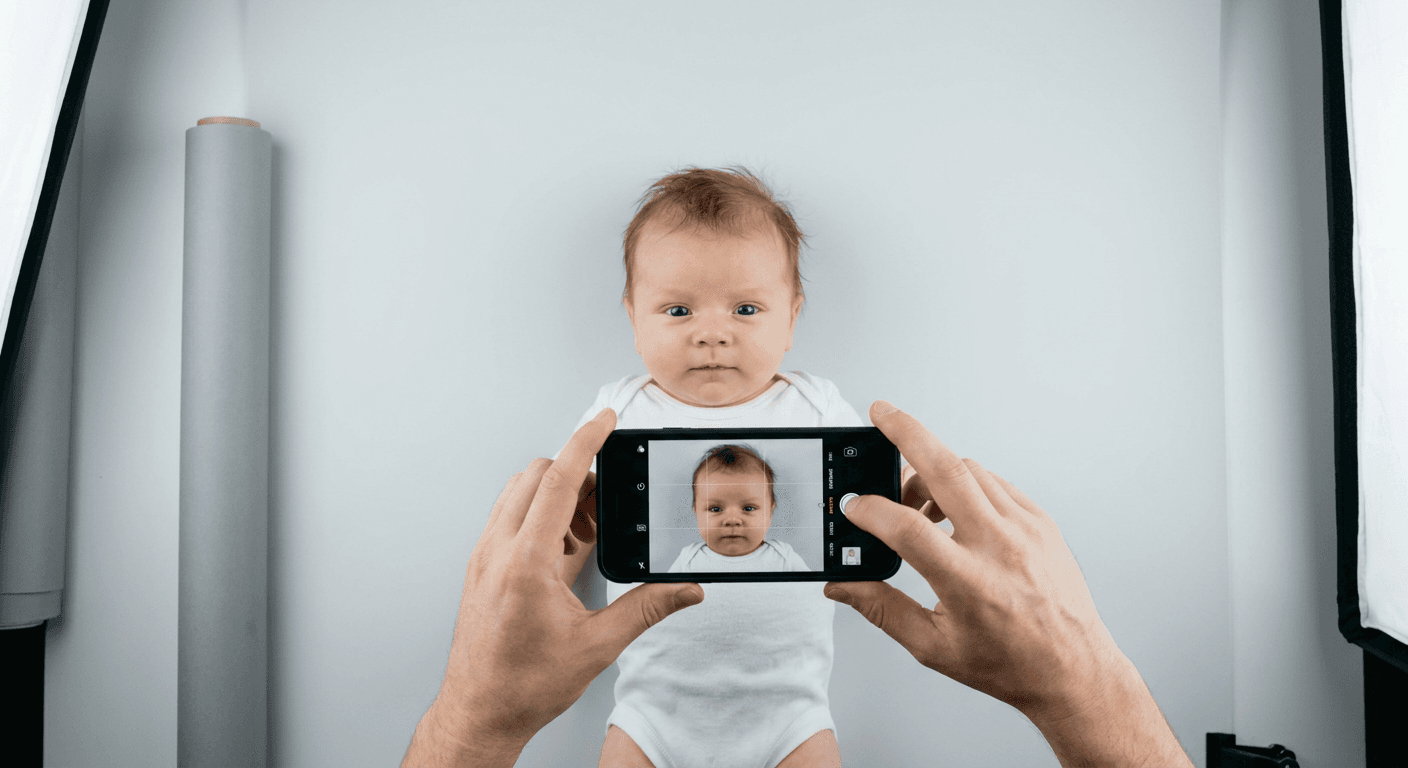
Many parents assume an identification image is just a miniature portrait, judging the outcome by whether the subject looks presentable. This misconception causes thousands of rejected travel applications every year. Modern border control does not look at a portrait; it reads topographical data. Automated facial recognition software uses the submitted image to map the exact geometric distances between the pupils, the tip of the nose, and the chin. A heavy shadow under the jawline is not just poor lighting; to a biometric algorithm, it registers as a physical deformity. Meeting passport photo requirements means providing clean, uncorrupted data to a machine, stripping away any environmental variables that might skew the digital map of the applicant's face.
Quick Summary
A government-compliant biometric image requires flat lighting, strict frontal positioning, and an untextured background to allow facial recognition software to map facial geometry accurately.
- Shadows and uneven lighting cause biometric scanners to miscalculate facial depth.
- The camera must sit exactly at eye level to prevent perspective distortion.
- Backgrounds must remain flat and uncreased to ensure clean edge detection.
- Digital files must retain high resolution before cropping to meet official specifications.
Table of Contents
- 1. Meeting Passport Photo Requirements Through Flat Lighting
- 2. Positioning the Subject for Biometric Scanning
- 3. Controlling the Background Colour and Texture
- 4. Capturing the Correct Facial Expression
- 5. Framing and Cropping to Specific Ratios
- Common Pitfalls & Troubleshooting
- FAQ
- Recommended Reads
1. Meeting Passport Photo Requirements Through Flat Lighting
Biometric mapping algorithms calculate the depth of the eye sockets and the protrusion of the nose based on pixel contrast. When a directional light source illuminates one side of the face more than the other, the resulting shadows artificially alter the perceived topography of the face. To prevent this, international civil aviation standards demand completely flat, diffuse illumination.
The mechanics of flat lighting require the light source to hit the subject straight on, rather than from an angle. When the light wraps evenly around the face, it fills in the hollows under the eyes and beneath the chin, ensuring the software records the genuine bone structure rather than the shadows cast by it.
The mistake most people make at home is positioning the subject sideways next to a window. This creates a harsh gradient across the face - bright on one cheek, dark on the other. A human recognises the face easily, but the border control software flags the asymmetrical contrast as a failure.
The fix is to stand directly in front of the window, placing the camera between the glass and the subject. Overcast daylight provides the most effective natural diffusion, acting as a giant softbox that eliminates sharp shadow lines entirely.
2. Positioning the Subject for Biometric Scanning
The camera maps a strict geometric grid. Facial recognition software needs a perfectly level focal plane. This establishes the vertical and horizontal axes of the face. Any rotation away from the camera breaks the symmetry the algorithm expects. This includes tilting the head up, looking down, or turning slightly to the side. In biometric terms, this involves standardising the pitch, yaw, and roll of the subject's head.
The camera lens must align precisely with the bridge of the subject's nose. When the lens sits too high and points downward, it introduces foreshortening, artificially enlarging the forehead and shrinking the chin. This throws off the required facial proportions entirely.
For infants, achieving this positioning usually requires laying them flat on their back. The common error here is holding the smartphone at a comfortable reading angle, which tilts the lens relative to the child's face. The camera must hover directly above them, entirely parallel to the floor.
Practical rule: If you can see the top of the subject's head or the underside of their chin in the viewfinder, the camera is not level and the biometric software will miscalculate the vertical facial axis.
3. Controlling the Background Colour and Texture
The background serves a single technical purpose: it provides a high-contrast, uniform canvas that allows edge-detection algorithms to isolate the subject's silhouette. When the software isolates the head, it draws a digital bounding box around it. Any texture, pattern, or shadow on the background compromises this boundary line.
Different jurisdictions require specific hex codes for this canvas. The UK mandates a plain cream or light grey, whereas the US requires pure white. The mechanics of capturing this accurately rely on distance. If a subject leans directly against a wall, their body casts a drop shadow onto the surface behind them. That shadow registers as part of the subject's outline, causing an immediate rejection.
The failure mode for home photography is usually a textured bedsheet used for an infant. Fabric creases cast micro-shadows that the algorithm reads as physical objects behind the subject. Pulling the fabric taut over a hard surface eliminates these shadows. For those struggling to source the exact shade of uncreased fabric, an alternative is capturing the subject on a smooth surface and using a dedicated UK Baby Passport Photo Maker to automatically digitise and replace the background according to regional specifications.
4. Capturing the Correct Facial Expression
The face is a moving structure. When a person smiles, the zygomaticus muscles pull the cheeks upward, narrowing the eyes and altering the measurable distance between the lips and the tip of the nose. Biometric systems require a relaxed facial baseline to prevent these temporary muscular shifts from corrupting the permanent data map.
This translates to a neutral expression: eyes open and looking straight at the lens, mouth closed, and jaw relaxed. The primary mistake parents make is applying standard portrait logic to a biometric capture. They instinctively make noises or wave toys to elicit a smile from a baby. While UK guidelines relax the strict neutral expression requirement for infants under one year old, the child's eyes must remain clearly visible, and an open-mouthed smile often causes infants to forcefully squint.
The most effective method for securing an infant's attention without triggering a smile is holding a high-contrast object immediately beside the camera lens in complete silence. This directs their pupil gaze straight down the barrel of the lens without engaging their facial muscles.
5. Framing and Cropping to Specific Ratios
When you review official passport photos specifications, the dimensional rules dictate exactly how much of the printed image the head must occupy. For a UK passport, the subject's head (measured from the crown to the point of the chin) must take up between 29mm and 34mm of a 45mm high photograph.
These underlying passport photos specs ensure the printed file carries enough resolution so that the facial features remain sharp when scaled to physical paper dimensions. Digital image files measure in pixels, while physical documents measure in millimetres. The bridge between them is dots per inch (DPI), which requires a dense, uncompressed original file.
The critical error applicants make is cropping the image too tightly while taking the photograph. Zooming in digitally degrades the resolution, and failing to leave sufficient space around the subject makes it impossible to adjust the head size later to meet the 29-34mm requirement.
Instead, shoot the subject from the mid-chest upward, leaving heavy negative space above the hair and outside the shoulders. If you are unsure about the required bounding boxes, reviewing UK & International Baby Passport Photo Requirements & Guides provides the exact structural measurements needed before applying the final crop.
Common Pitfalls & Troubleshooting
Three specific errors cause the vast majority of compliance failures. They often look perfectly fine to the human eye, but instantly trip automated verification software.
The Background Gradient Symptom: The image features a plain background, but one corner of the backdrop is slightly darker than the opposite corner. Fix: This is the most common real cause of automated rejection. The edge-detection algorithm fails because it expects a uniform pixel value across the entire background layer. You must either move the subject further away from the light source to ensure the background is evenly illuminated, or digitise the image to replace the background entirely.
Digital Artefacts from Red-Eye Removal Symptom: The subject's eyes appear normal and dark, but the application is flagged for digital manipulation. Fix: Smartphone cameras frequently apply automated red-eye reduction when detecting faces. This software artificially paints dark pixels over the pupil. Border control algorithms scan for pixel manipulation and immediately invalidate edited files. Turn off all automated portrait enhancements, beauty filters, and red-eye reduction tools in your camera settings before taking the photograph.
The Floating Head Crop Symptom: The image looks like a standard passport photo sample, featuring the face and background, but the shoulders are cut out of the frame. Fix: Biometric guidelines require a view of the upper torso to establish the physical axis of the neck and spine. If you crop the image too tightly around the jawline, the software cannot calculate posture. You must re-shoot the image, stepping back to ensure the collarbone and the tops of both shoulders are clearly visible in the raw file before applying the final aspect ratio crop.
FAQ
Can I use a smartphone camera for official biometric images? Yes, provided the camera does not apply automated portrait filters. Modern smartphone lenses capture more than enough resolution, but you must manually disable beauty modes, artificial background blurring (portrait mode), and red-eye reduction. The raw output must be completely unedited by the device's internal software.
Do infants need to maintain a completely neutral expression? Rules vary by jurisdiction, but generally, children under the age of one are permitted slightly relaxed rules regarding expressions. A small open mouth is usually accepted, but the eyes must remain open and clearly visible. Crying, however, squints the eyes and distorts facial geometry, which will result in a rejection.
How much space should I leave around the head before cropping? Always capture the subject from the sternum upward. Leave at least an equal amount of empty background space above the top of the hair as the total length of the subject's face. This provides the necessary digital canvas to resize the head later to meet the strict 29mm to 34mm UK crown-to-chin specification.
What causes an image to be flagged for digital manipulation? Any manual alteration of the subject's physical features triggers a manipulation flag. This includes smoothing skin, removing blemishes, altering the shape of the jaw, or artificially darkening the pupils. While extracting and replacing a background to meet the plain grey requirement is permitted when done accurately, touching the pixels that make up the applicant's face is strictly prohibited.