How to Meet the Hong Kong Passport Photo Size and Global Biometric Standards
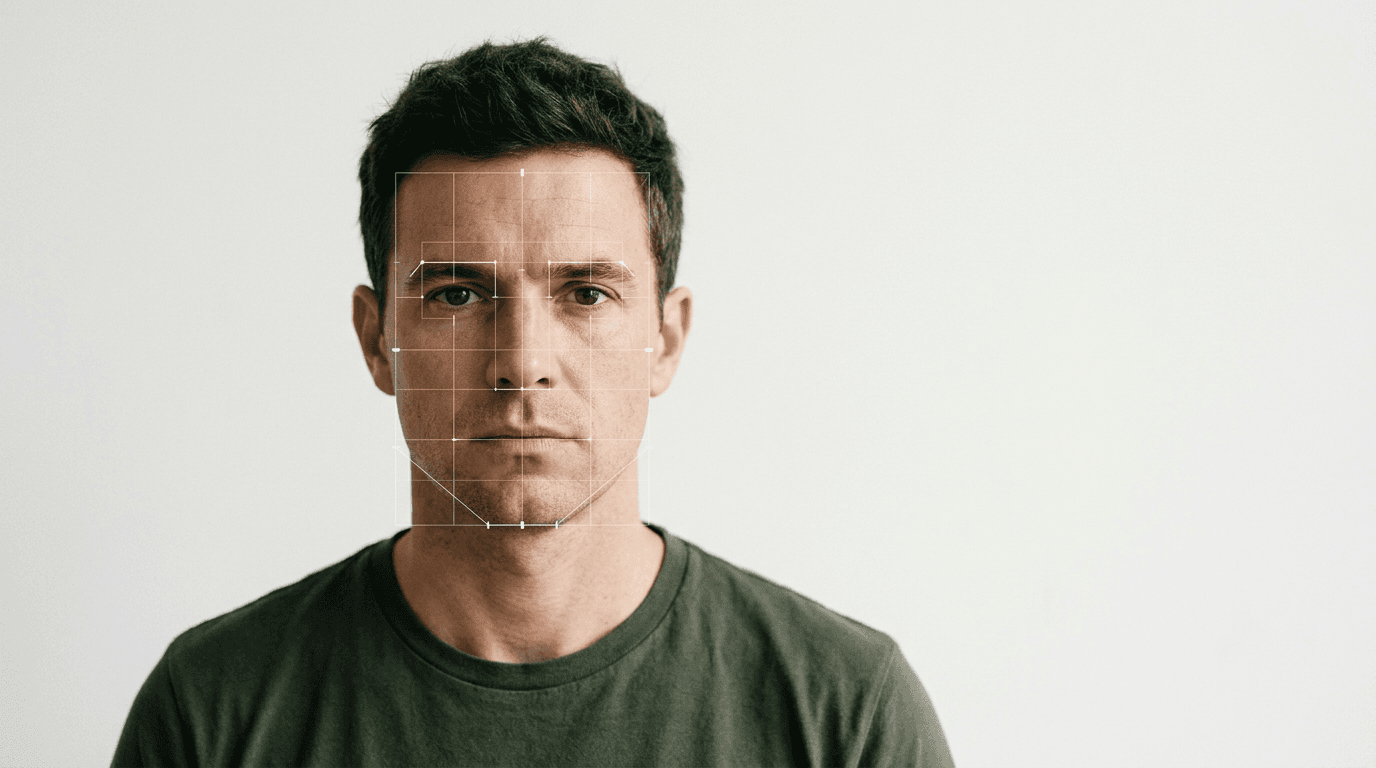
A rejected digital visa application usually drops a single, vague error code: image does not meet formatting criteria. You check the aspect ratio and try again, only to fail because the subject's chin-to-crown measurement falls one millimetre outside the target country's tolerances. Successfully formatting the exact hong kong passport photo size or a strict Schengen specification is not merely a matter of scaling down a high-resolution portrait. It requires mapping physical facial proportions to absolute pixel dimensions. This process breaks instantly if the source photograph contains uneven background lighting, incorrect posture, or minor lens distortion. This guide details how to capture, format, and verify biometric imagery so it passes automated government compliance checks on the first upload.
Quick Summary
Government compliance for digital passport and visa photographs relies on exact physical-to-digital scaling. Applications require a precise overall image dimension combined with strict internal measurements dictating where the subject's eyes and chin must sit within the frame. Failing these internal proportions triggers automated portal rejections immediately.
- Verify both the exact physical print dimensions and the digital pixel equivalent for your destination.
- Ensure the crown-to-chin measurement falls within the specified percentage of the total image height.
- Light the subject uniformly to eliminate background shadows that scanning software interprets as facial geometry.
- Never compress the final file through mobile messaging applications before uploading to a government portal.
Table of Contents
- 1. Match the Hong Kong Passport Photo Size and Other Baseline Dimensions
- 2. Set Up the Environment for Biometric Capture
- 3. Position the Subject for Strict Nodal Mapping
- 4. Format and Crop the Image for Submission
- 5. Verify Digital Specifications Before Upload
- Common Pitfalls & Troubleshooting
- FAQ
- Recommended Reads
1. Match the Hong Kong Passport Photo Size and Other Baseline Dimensions

Internal head scaling triggers more automated rejections than outer borders
Governments do not use a universal standard for biometric identification. A photograph formatted for one jurisdiction will almost certainly fail the automated validation of another. The outer border dimensions are only the primary threshold; the internal bounding box - the mandatory distance between the bottom of the chin and the top of the skull - is where most applications fail.
When formatting the hong kong passport photo size, the physical print must measure exactly 40 millimetres wide by 50 millimetres high. However, the critical metric is the vertical span of the head, which must occupy between 32 and 36 millimetres of that height. If the subject's head is too small, the system assumes the photo was taken from too far away, degrading the iris resolution.
If you are dealing with the spain visa photo size, the rules follow the standard Schengen protocol. The outer dimensions shrink to 35 by 45 millimetres, but the head must take up 70 to 80 percent of the vertical space. The visual result is a much tighter crop on the face than Asian or North American standards.
Consulting international baby passport photo requirements before capturing the image prevents you from framing a shot too tightly to be cropped later. Once an image is captured with the top of the head touching the edge of the frame, no digital cropping tool can recover the missing negative space required by strict portal guidelines.
2. Set Up the Environment for Biometric Capture
Soft lighting prevents shadows from reading as facial geometry
Before touching a camera, the physical environment must be stripped of any variable that an automated scanning tool could misinterpret. Biometric validation software converts your colour image into a high-contrast grayscale map to measure facial depth. Any shadow cast against the background or across the face is read as physical geometry. A heavy shadow beneath the chin registers as an elongated jawline; a shadow beside the nose registers as asymmetry.
To eliminate background shadows, position the subject at least half a metre away from the backdrop. This distance ensures that any light cast onto the subject falls off before hitting the wall behind them. For the background itself, strictly adhere to the destination country's colour mandates. The UK's HM Passport Office requires a plain light grey or cream background, whereas North American standards demand pure white.
Photographing infants introduces severe environmental challenges. A newborn cannot support their own head or sit against a wall. The most reliable mechanism is to drape a perfectly smooth, colour-compliant sheet over a car seat or baby bouncer. This supports the infant at a slight incline while providing a uniform background. Ensure no wrinkles appear behind the head, as high-resolution scanners flag sharp fabric creases as background interference.
3. Position the Subject for Strict Nodal Mapping
Lens distortion permanently alters the biometric distances between features
Facial recognition algorithms rely on nodal points: they measure the pupillary distance, the width of the nose at the alar base, the bizygomatic breadth across the cheekbones, and the depth of the eye sockets. For these measurements to map accurately against border control databases, the subject's posture must be rigidly neutral.
When a subject smiles, the zygomatic major muscle contracts, raising the cheeks, narrowing the visible eye aperture, and pulling the corners of the mouth outward. This muscular shift completely alters the algorithm's base measurements, causing an instant rejection. The subject must maintain a neutral expression with eyes open, mouth closed, and both ears clearly visible to confirm the head is perfectly level.
When capturing these images on a smartphone, you must control for lens distortion. Smartphone cameras use wide-angle lenses by default. If you hold the device 30 centimetres from the subject's face to fill the frame, the lens will optically bulge the centre of the image. This barrel distortion artificially enlarges the nose and shrinks the ears, permanently altering the biometric nodal distances. You must stand at least 1.2 to 1.5 metres away from the subject, capturing their entire upper torso, and use a slight optical zoom to compress the background and flatten the facial features into true proportion.
The rules offer narrow exemptions for infants under twelve months. While newborns are not strictly required to have their eyes fully open or looking directly at the lens, their face must remain entirely unobstructed. Dummy clips, pacifiers, toys, or a parent's supporting hand appearing anywhere in the frame will trigger an immediate failure.
4. Format and Crop the Image for Submission
Automated printer scaling destroys millimetre-accurate crops
Translating a raw digital capture into a compliant file requires understanding the difference between absolute pixel dimensions and print resolution. You cannot rely on a phone's built-in cropping tool, which only locks the aspect ratio without providing the necessary overlay grids to measure the internal head proportions.
Translating digital pixels to a physical print for the us passport photo size requires placing a two-by-two-inch image onto a standard 4x6 inch photographic template. The US specification requires the head to measure between 25 to 35 millimetres from the bottom of the chin to the top of the head. If you submit a digital file for an online application, it must measure exactly 600 by 600 pixels.
If you generate a digital layout containing multiple passport images to print at a local pharmacy, the printing hardware poses the final risk.
Practical rule: Never use a photo printer's "fit to page" or "borderless" setting when generating physical copies, as this applies a microscopic automatic zoom that distorts the required head-to-image ratio and invalidates the photo.
Ensure the kiosk is set to print at 100% scale with borders intact. If you use an automated digital tool to map these proportions, you are uploading biometric data. Always check for a strict privacy policy ensuring your uploaded files are purged immediately after processing.
5. Verify Digital Specifications Before Upload
Messaging applications silently strip the metadata required by application portals
A visually perfect photograph will still fail if its underlying file architecture does not meet the application portal's technical constraints. Government upload portals inspect the file format, the total file size, the colour space, and occasionally the metadata attached to the image.
Most portals mandate standard JPEG formatting. They strictly enforce a minimum and maximum file size, typically between 50 kilobytes and 10 megabytes. If your file is too small, the system assumes the resolution is too low to extract a viable biometric map. If your file is saved in the wrong colour space, the automated scanner may misinterpret skin tones and reject the image for poor lighting.
The most common way users accidentally degrade their file size is by transferring the image between devices using messaging applications. These platforms apply aggressive compression algorithms to save bandwidth, stripping away necessary metadata, reducing the pixel density, and introducing blocky artefacts into what should be a smooth background. Always transfer the original file via email at its full size or use a direct cloud storage link. If you prefer to rely on automated software to handle these formatting constraints, look for platforms offering a 100% refund policy against automated portal rejections, as compression issues often reveal themselves only during the final upload phase.
Common Pitfalls & Troubleshooting
Even with precise measurement, biometric photographs routinely fail during the final validation step. Diagnosing the exact cause of a rejection code prevents you from repeating the same capture error. The most frequent failure states look identical at a glance but require entirely different interventions.
The "Non-Uniform Background" Rejection
This failure occurs when the portal's validation algorithm detects variations in the background's pixel data. It is rarely caused by the actual physical backdrop.
- The Symptom: The application portal rejects a seemingly perfect grey or white background for being uneven or textured.
- The Fix: This is a digital compression artefact, not a lighting issue. The image was saved at too low a JPEG quality, causing the smooth background to break into jagged, slightly different coloured blocks. Export the original file again with a high JPEG quality setting to maintain smooth pixel transitions, and ensure it is saved in the sRGB colour space.
The "Head Outline Obscured" Rejection
Automated scanners must locate the exact edge where the subject's hair or skin meets the background to calculate the outer head volume.
- The Symptom: The portal states that the subject's head blends into the background, often occurring with subjects who have light blonde or white hair on a pure white background, or very dark hair in an underlit room.
- The Fix: Increase the contrast between the subject and the backdrop. If the destination country permits it, switch from a pure white background to a light grey one. Introduce a faint secondary light source pointing exclusively at the background to separate the subject's outline from the wall. You can also try contacting support teams associated with digital compliance tools for specific lighting feedback based on your setup.
The "Eyes Outside Acceptable Zone" Rejection
Every digital biometric standard specifies a horizontal band where the subject's eyes must sit relative to the bottom edge of the image.
- The Symptom: The chin-to-crown measurement is correct, but the system rejects the photo for eye placement.
- The Fix: The image crop is anchored incorrectly. The subject's head is tilted forward or backward, which artificially raises or lowers the eyes without changing the total vertical head measurement. Recapture the image ensuring the camera lens is perfectly level with the subject's eye line, not looking down or up at them.
FAQ
Can I use a smartphone to capture a biometric photograph?
Yes, provided you disable all default artificial intelligence enhancements. Modern smartphones automatically apply portrait mode blurring, skin smoothing, and digital relighting. These computational photography features alter the true physical geometry of the face and blur the outer edges of the hair, triggering immediate rejections from border control software. You must use the standard photo mode with all filters completely disabled.
How do I photograph an infant who cannot support their own head?
Lay the infant on their back on the floor or in a baby bouncer, with a plain, light-coloured, wrinkle-free sheet spread beneath them. Shoot from directly above, ensuring your own body does not cast a shadow over the child's face. Never use your hands to prop up their head, as any foreign object or skin in the frame invalidates the shot.
Why did the digital portal reject an image that a local pharmacy approved?
Retail photo kiosks often rely on basic templates that only check the outer crop box rather than the internal biometric mapping. A kiosk will print an image where a smile has distorted the subject's pupillary distance, whereas a government portal's algorithmic validation will instantly detect the anatomical shift and reject the file.
Does the digital file require the same resolution as a physical print?
No. Physical prints require a high dot-per-inch density, typically 300 to 600 DPI, to ensure the ink does not blur the facial features. Digital uploads are measured in absolute pixels, such as a 600 by 600 pixel grid. DPI is irrelevant to a digital portal; only the final pixel dimensions and the file size matter.