How to Take a Compliant Passport ID Photo and Avoid Biometric Rejection
A passport officer rejects a digital upload on a Tuesday morning not because of a subjective whim, but because an automated validator flagged a three-millimetre head tilt. When preparing to make passport applications, the photo is the single most common point of failure. The requirements are not decorative; they are strict machine-vision rules designed to ensure that a digital passport id photo can be read by automated border control gates worldwide. Understanding how these standards are enforced is the key to passing the application process on your first attempt without costly delays.
Quick Summary
A compliant passport identification photo must satisfy strict international biometric standards, aligning facial geometry with automated machine-reading software. Even minor variations in illumination, head angle, or background contrast will trigger automated system rejections.
- Biometric Alignment: Eyes must be completely level, looking directly into the camera lens with a neutral expression.
- Contrast and Lighting: Uniform illumination across the face prevents shadows that algorithms misinterpret as facial contours.
- Sizing Geometry: Millimetre-level accuracy is required for head-to-chin ratios, which vary significantly by jurisdiction.
- Resolution and Quality: Digital files must avoid compression artifacts, while prints must be on professional-grade photographic paper.
Table of Contents
- Why a passport id photo fails biometric gate checks
- Why modern border gates reject manual photography adjustments
- How different nations partition facial space on the passport photo page
- Where the passport photo application breaks during domestic processing
- Why physical photo booths fail for newborn biometric enrolment
- Decoupling photo dimensions: how international specifications diverge
- FAQ
- Recommended Reads
Why a passport id photo fails biometric gate checks
The passport photo is no longer just a visual reference for a human customs officer; it is an entry point into a complex global biometric network governed by the International Civil Aviation Organization (ICAO). Every official passport id photo is processed by machine-learning models that map facial geography. The goal of these automated checks is to extract a biometric template - a digital mathematical map of your unique facial features.
When an image is submitted, the validator software uses facial landmark detection algorithms, such as active appearance models, to locate critical facial points. The system maps the vertical coordinates from the bottom of the chin to the top of the crown, and the horizontal coordinates between the outer corners of both eyes. If a candidate holds their head at a slight angle - even a fraction of a degree - the perspective changes. This geometric distortion ruins the mathematical distance ratios, leading to an automated rejection.
To act on this today, you can easily check your own photo using a digital alignment test. Draw a straight, horizontal line across the centre of both pupils. If the line is not perfectly parallel to the top edge of the image frame, the head is tilted. You must retake the shot rather than attempting to rotate the image digitally, as rotation can distort the pixel grid.
Practical rule: Never edit, airbrush, or filter a biometric photo. Automated validation software detects pixel-level smoothing and flags it as a counterfeit attempt, resulting in an automatic rejection.
Why modern border gates reject manual photography adjustments
Behind the scanner at modern border control terminals lies a series of automated filters that verify compliance in real time. These gates operate under the strict technical rules of ICAO Doc 9303, which standardises biometric facial recognition. When a digital passport is scanned, the machine converts the facial photograph from the chip into a normalised, high-contrast greyscale format to analyse its structural details.
One of the primary reasons manual photography adjustments fail is the disruption of edge-detection boundaries. The software looks for sharp, clear transitions between the edge of the subject's head and the background. If you stand in front of a wall with heavy shadows, or if a household item is visible in the background, the edge-detection algorithm cannot separate your hair or shoulders from the environment.
Manual attempts to remove backgrounds using crude digital paintbrushes create unnatural, razor-sharp edges. Biometric systems verify the frequency domain of edge pixels. A natural photograph has a soft, sub-pixel gradient transition caused by lens depth and lighting. An edited photo has a flat, single-pixel drop-off. The machine flags this instantly as an altered image. To ensure your photo passes, shoot against a naturally flat, evenly illuminated surface instead of relying on manual touch-ups.
How different nations partition facial space on the passport photo page
A common mistake when preparing photos is assuming that a single, standardised file size works universally. In reality, different jurisdictions partition the passport photo page with highly specific, non-negotiable ratios. The physical size of the photo and the percentage of the frame occupied by the face are carefully calibrated to match each nation's domestic facial recognition databases.
For instance, the United Kingdom and the European Union adhere to a standard template of 35mm wide by 45mm high. Within this space, the vertical height of the head from chin to crown must occupy between 29mm and 34mm. However, if you are applying for a United States passport or visa, you must submit a square 2-inch by 2-inch (approximately 51mm by 51mm) photo, with the head occupying between 50% and 69% of the overall image height.
These parameters are structurally rigid. If you submit a UK-sized photo for a US application, the aspect ratio is entirely wrong, making it impossible to crop without losing biometric coordinates. When preparing these images, consulting the official UK and international baby passport photo requirements ensures you avoid common geometric pitfalls before submission. Check the exact measurements required for your target document before you capture any images.
Where the passport photo application breaks during domestic processing
When an online portal rejects an upload with a generic error, it is almost always due to one of four distinct technical faults. These issues look identical from the outside but stem from completely different lighting or camera settings.
- Diffusion Wash (Over-exposure): This occurs when a direct camera flash or harsh overhead light washes out the fine details of the face. The scanner cannot find the ridge of the nose because there is no tonal contrast between the nose and the cheeks. Symptom: The nose area appears as a flat white shape with no visible shadows or contour lines.
- Micro-Shadowing (Asymmetric Lighting): This is caused by a single light source coming from one side of the subject. It creates deep shadows behind one ear, under the chin, or beside the nose bridge. Symptom: Half of the face is darker than the other, causing the algorithm to miscalculate the bilateral symmetry of your face.
- Compression Artifacting (Low Digital Quality): Saving the image at a low quality setting to meet a file-size limit introduces square, blocky pixels around the eyes and mouth. Symptom: Zooming in on the eyes reveals pixelated blocks rather than smooth, clear curves, which disrupts pupil detection. Practical Troubleshooting: For specific hardware and camera setups, refer to the help centre to troubleshoot sensor distance and lens distortion.
- Biometric Alignment Shift (Structural Tilt): This occurs when the subject's head is tilted forward, backward, or sideways, changing the apparent distance between the facial features. Symptom: The distance from the nose bridge to the chin falls outside the accepted percentage of the total frame height.
To diagnose which issue you are facing today, answer these four questions:
- Are there visible shadows cast on the wall behind you or on one side of your neck? (If yes, you have micro-shadowing).
- Is the bridge of your nose completely white with no visible transition to your cheeks? (If yes, you have diffusion wash).
- Can you see blocky, square patterns when zooming in on the pupils? (If yes, you have compression artifacting).
- Are your shoulders level and your gaze directed straight ahead? (If no, you have biometric alignment shift).
Why physical photo booths fail for newborn biometric enrolment
Traditional commercial photo booths are structurally engineered for adults. The camera is fixed at a height designed to capture a seated adult torso. The lighting is positioned at angles that assume a specific facial height and depth, while the bench is usually rigid.
Attempting to use these booths for infants or toddlers is a recipe for rejection. A baby cannot sit unassisted on the booth bench, and a parent attempting to hold them will inevitably introduce their own hands, shoulders, or face into the camera frame. This instantly triggers a rejection because the image contains more than one person. It makes it incredibly difficult to create a passport photo that passes automated scrutiny.
Additionally, babies cannot respond to commands to look straight ahead, keep their mouth closed, or maintain a neutral expression. The enclosed space of a public booth, combined with the loud noise of the flash charging, often causes distress, leading to crying, squinting, or turning away.
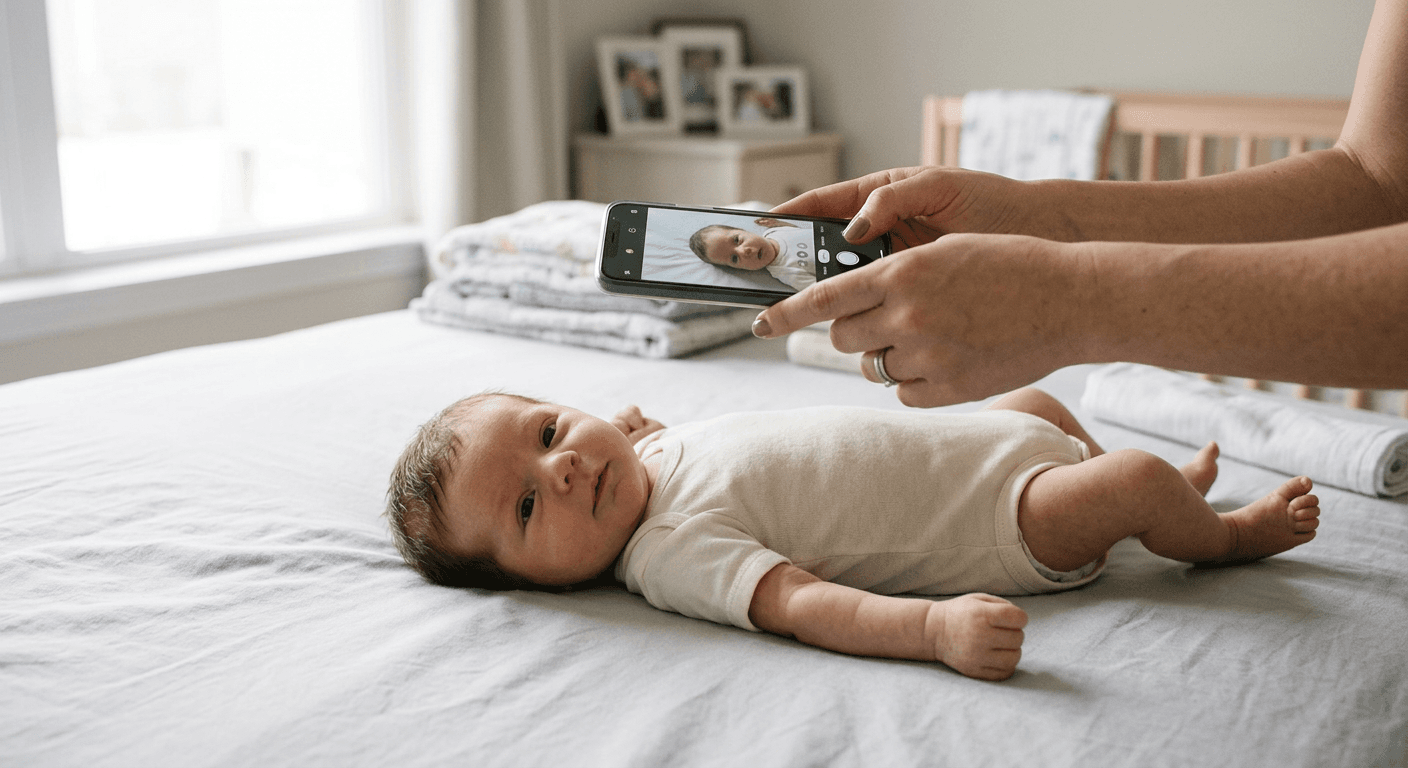
Taking the photo at home allows you to control the environment. You can place the infant on a light grey or off-white sheet, utilise soft, natural window light to eliminate harsh shadows, and take multiple shots when the baby is relaxed. This allows you to generate a valid photo profile and quietly create a passport compliant image without leaving your home.
Practical rule: When photographing a newborn, lay them flat on their back on a plain, light-coloured sheet. Stand directly above them, keep your smartphone camera parallel to their face to avoid perspective skew, and shoot when their eyes are open and their hands are out of the frame.
Decoupling photo dimensions: how international specifications diverge
To guarantee acceptance, your photo must align precisely with the dimensional boundaries set by your target country's immigration department. Below is a detailed breakdown of the geometric specifications for major global jurisdictions.
| Region / Country | Physical Size (mm / inches) | Head Height Ratio | Acceptable Background Colour | Common Submission Pitfalls |
|---|---|---|---|---|
| United Kingdom (UK) | 35 x 45 mm | 29 - 34 mm (Chin to Crown) | Light Grey or Off-White | Shadows behind ears, smiling, tilted head |
| European Union (EU) | 35 x 45 mm | 32 - 36 mm (Chin to Crown) | Light Grey / Blue / White (varies) | Incorrect head scaling, reflections in glasses |
| United States (US) | 51 x 51 mm (2 x 2") | 25 - 35 mm (1 - 1.375") | Plain White or Off-White | Smiling, wearing glasses (strictly banned) |
| Australia | 35 x 45 mm | 32 - 36 mm (Chin to Crown) | Plain White or Light Grey | Teeth showing, hair obscuring eyes |
| Canada | 50 x 70 mm | 31 - 36 mm (Chin to Crown) | Plain White or Light Grey | Missing photographer stamp, shadow on face |
When printing these files, check your print dialog settings carefully. Ensure that "Scale to Fit" is deselected and that you are printing at exactly "100% scale" or "Actual Size". If the software scales the image to fit the paper size, it will shrink or enlarge the photos by several millimetres, resulting in automatic rejection.
FAQ
Can I wear glasses in a passport photo?
Under UK HMPO guidelines, you may wear prescription glasses only if they are worn daily, do not have tinted lenses, do not create reflections or glare, and do not obscure your eyes. In contrast, countries like the United States have a strict ban on glasses of any kind. To minimise the risk of rejection, it is highly recommended to remove your glasses entirely before taking the photo.
Can my baby's mouth be open in a passport photo?
For infants under one year of age, the rules are relaxed. The UK passport office does not require babies under 12 months to have a neutral expression, and their eyes do not need to be open or looking at the camera. For children aged six and over, and all adults, the mouth must be completely closed with a neutral expression.
What is the best background colour for a UK passport photo?
The UK passport office strictly requires a light grey or cream background. Pure white backgrounds are often rejected because they reduce the contrast needed to distinguish light-skinned individuals or light hair, making edge-detection difficult for biometric software.
Why did my high-resolution photo get rejected?
High resolution does not ensure compliance. Rejections are typically caused by uneven lighting that creates facial shadows, an incorrect head-to-chin ratio, a non-compliant background, or aggressive file compression that introduces pixelated artifacts around the eyes, even if the original image was shot with a professional camera.