How to Take Compliant Infant Passport and Visa Photos at Home
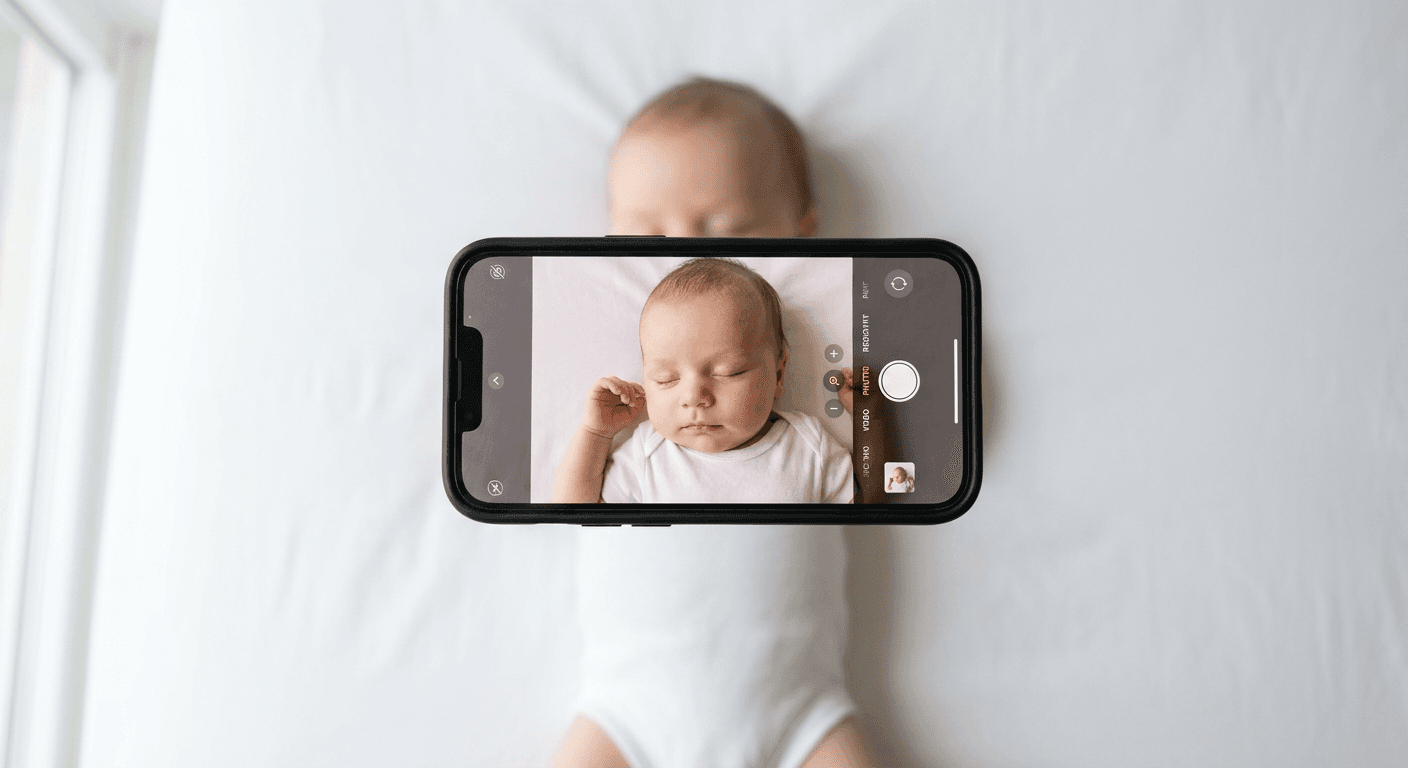
The application return envelope lands on the doormat, noticeably thicker than an approval letter. Inside, the documents are paused due to an "unacceptable shadow behind the left ear" in the infant's picture. Securing compliant passport and visa photos for an infant is a rigid biometric exercise, not a portrait session. Automated government scanners map facial geometry using fixed contrast ratios, frequently rejecting digital files that human reviewers would consider perfectly clear. Bypassing the traditional photography studio requires executing specific lighting setups, understanding smartphone focal lengths, and leveraging algorithmic processing to guarantee structural compliance.
Quick Summary
Producing official biometric imagery for infants involves capturing precise facial geometry without shadows, focal distortion, or background texture. Meeting international standards from home requires controlled ambient lighting, parallel camera positioning, and dedicated formatting software rather than manual image editing.
- Flat, diffuse window light eliminates the asymmetric shadows that automated scanners misread as physical features.
- Using a smartphone's telephoto lens prevents wide-angle barrel distortion from altering mandatory head-to-chin ratios.
- Burst photography captures sharp focus during brief windows of infant stillness, preventing motion blur.
- Algorithmic processing extracts the subject and scales the head height to exact government millimetre requirements.
Table of Contents
- 1. Preparing the Environment for Passport and Visa Photos
- 2. Positioning the Infant
- 3. Capturing the Image
- 4. Processing the Digital File
- 5. Preparing for Physical Submission
- Common Pitfalls and Troubleshooting
- FAQ
- Recommended Reads
1. Preparing the Environment for Passport and Visa Photos
Flat lighting prevents biometric rejection
Government software maps faces geometrically. It measures the distance between high-contrast points, primarily the eyes, nose, and chin. Human eyes filter out shadows caused by uneven lighting. Biometric scanners interpret those shadows as dark structural boundaries. A shadow falling under the infant's chin or beside the nose alters the software's reading of the face's physical dimensions. This triggers an automatic rejection before a human ever views the file.
Achieving the required flat lighting requires abandoning artificial room lights, which cast harsh, multi-directional shadows. Instead, rely entirely on diffuse natural daylight. Position the infant on a firm surface near a large, North-facing window, or photograph them on a bright but overcast day. Direct sunlight must be avoided completely, as it causes the subject to squint and creates deep, rejected shadows across the eye sockets.
Before taking the picture, block any nearby reflective surfaces. These might cast a colour tint onto the infant's skin. You can easily inspect the lighting quality. Hold your own hand directly above the intended shooting area. If your hand casts a hard, defined shadow on the surface below, the light is too directional. When the lighting is sufficiently flat, you will see a catchlight. This is a small, even reflection of the window in both of the infant's irises. For specific national background colour mandates, checking the UK and international baby passport photo requirements and guides ensures you use the correct underlying sheet.
2. Positioning the Infant
Focal length and posture dictate facial geometry
Smartphone cameras default to wide-angle lenses, which are engineered to capture broad scenes. When a wide-angle lens is brought within 30 centimetres of a subject's face, it creates barrel distortion - stretching the centre of the image while compressing the edges. In a portrait, this artificial distortion enlarges the nose and shrinks the ears, permanently failing the mathematical proportion checks required for biometric verification.
Infants lack the neck strength to sit upright in a chair. The most secure method to maintain their posture without introducing supporting hands into the frame is to lay them completely flat on a plain white or cream sheet. Do not use a soft mattress or deep bedding; the infant will sink into the fabric, pulling the sheet up around their ears and creating deep background shadows. Use a firm floor space instead, pulling the fabric taut beneath them.
Practical rule: Keep the smartphone camera completely parallel to the floor; tilting the device even a few degrees forward or backward alters the mapped distance between the eyes and the chin.
To eliminate the wide-angle distortion, switch your smartphone camera to its 2x or 3x telephoto setting and physically step back to a distance of at least 1.2 metres from the infant. Hover directly overhead. Visually check the screen to ensure both of the infant's ears are equally visible; if one ear is obscured or appears smaller, the infant's head is turned, and you must wait for them to look dead centre.
3. Capturing the Image
Continuous shooting secures the baseline expression
Infants cannot follow instructions to hold a neutral expression. A compliant visa passport photo requires the subject to look directly at the lens with closed lips, no smile, and no exaggerated facial movements. While some jurisdictions offer slight leniency for newborns regarding closed eyes, submitting an image with open eyes eliminates the risk of an officer rejecting the application based on their individual interpretation of the rules.
Attempting to time a single shutter press alongside an infant's brief moments of stillness results in shutter drag - a microscopic motion blur that softens the edges of the facial features. When the file is scaled up by the reviewing software, this micro-blur prevents the system from locking onto the edges of the iris, causing the image to fail the mandatory sharpness threshold.
Activate your smartphone's burst mode functionality to capture 15 to 20 frames per second. Wait for the infant to look directly upward, then hold the shutter button down for a full two seconds. Ensure your own hands, arms, and shadow remain entirely out of the frame. Parents frequently attempt to steady the infant by holding their shoulders, but the presence of a foreign hand or limb in the crop invalidates the image immediately. After capturing the burst, zoom in to 100% on the selected file specifically on the eyes; if the boundary of the iris is soft or smeared, discard the image and shoot again.
4. Processing the Digital File
Algorithmic formatting overrides manual cropping errors
Official document standards mandate precise physical canvas dimensions and exact head height ratios. For example, a UK passport application dictates that the head must measure between 29 and 34 millimetres from the crown to the chin within a standard frame. Furthermore, the background must often register as a uniform hex code without any visible fabric texture or wrinkles.
Using standard smartphone editing sliders to cut out backgrounds leaves jagged, unnatural edges around the subject's hair, which reviewers immediately flag as digital manipulation. Similarly, attempting to scale the head size manually is guesswork that rarely aligns with the rigid millimetre scales used by government algorithms. When you prepare to get online passport files ready for submission, manual editing introduces an unacceptably high rate of failure.
Instead, pass the raw, unedited image through a dedicated UK baby passport photo maker. These AI-driven tools verify the image against 20 distinct points of failure - including head tilt, eye alignment, and shadow density. The software extracts the subject seamlessly, replaces the background with the exact mandated colour code, and mathematically scales the file to meet the required ratios. This is the only reliable way to make passport applications compliant without visiting a specialized studio. Before submitting, verify that the output file remains uncompressed; heavy compression destroys the pixel data and triggers automated rejection.
5. Preparing for Physical Submission
Kiosk dye-sublimation prints bypass domestic ink banding
While many applications are now digital, certain visa processes and physical passport renewals still require hard copies. Governments dictate that these photographs must be printed on high-quality, continuous-tone photographic paper. Domestic inkjet printers operate by spraying microscopic droplets of ink in horizontal lines. Even on high-quality settings, these printers leave micro-banding - faint, parallel lines across the image. When a passport office scans the submitted photograph into their database, their high-resolution machinery detects these lines as an anomaly, resulting in rejection.
When you create a passport application package that requires physical prints, do not rely on your home office equipment. Instead, generate a digital 4x6 inch template containing multiple correctly sized passport crops. Take this digital file to a retail photo kiosk, such as those located in Boots or Tesco. These machines use dye-sublimation technology, which uses heat to transfer dye onto the paper in a continuous, streak-free tone that perfectly replicates traditional darkroom printing.
Before leaving the kiosk, hold the final print at a shallow angle to the overhead light. If you can see horizontal lines reflecting on the glossy surface, the machine's print head was misaligned, and you should request a reprint. When separating the individual photos from the template, use the kiosk's heavy-duty guillotine rather than domestic scissors, as frayed or unevenly cut edges can also cause issues during processing.
Common Pitfalls and Troubleshooting
Automated systems fail images for highly specific technical reasons that are not always obvious to the naked eye. Recognizing these faults before submission saves weeks of delay.
Background Tinting (Most Frequent Cause of Rejection)
- Symptom: The infant's skin exposure looks natural, but the background sheet appears dull grey, blue, or unevenly lit.
- Diagnosis: The smartphone's auto-exposure metered strictly for the face, causing it to underexpose the lighter background sheet. Alternatively, light reflecting off a nearby coloured wall cast a tint onto the fabric.
- Fix: Do not attempt to use photo filters to brighten the background, as this will blow out the highlights on the infant's face and invalidate the image. The safest approach is to utilize an automated background removal tool that replaces the backdrop with a pure, uniform colour while leaving the facial exposure untouched.
Red-Eye and Flash Reflections
- Symptom: The pupils appear white or red, or a harsh white specular highlight obscures part of the iris.
- Diagnosis: The smartphone's LED flash fired directly into the infant's face, bouncing off the retina. Software cannot map an eye if the iris colour is obscured by a reflection.
- Fix: Disable the smartphone flash entirely. Move the infant closer to the natural light source to raise the ambient exposure, ensuring only a small, natural catchlight appears in the eye.
Incorrect Head-to-Chin Ratio
- Symptom: The digital checker rejects the image stating the head is too large or too small for the frame, despite looking proportionally normal on a phone screen.
- Diagnosis: The file was cropped manually to a standard aspect ratio (such as 1:1 or 4:3) without scaling the subject inside the canvas according to the strict millimetre requirements.
- Fix: Discard the manually cropped version. Upload the original, uncropped wide shot into a biometric formatting tool that mathematically measures and sets the chin and crown boundaries before generating the final cut.
Asymmetrical Facial Shadowing
- Symptom: One side of the nose, jaw, or eye socket is noticeably darker than the other.
- Diagnosis: The primary light source was positioned at a sharp angle to the face (side-lighting). This creates depth, which biometric scanners misread as structural irregularity.
- Fix: Rotate the infant's position so their feet point directly toward the light source, ensuring the light falls evenly across the centre of the face rather than across it.
FAQ
Can I hold my baby while taking the photograph? No. Hands, arms, or any part of a parent visible in the frame will cause an immediate rejection. Laying the infant flat on a plain, firm background is the only reliable method to keep physical supports completely out of the shot.
Do an infant's eyes need to be completely open? For UK requirements, infants under one year old do not strictly need to have their eyes open. However, if the eyes are open, they must look directly at the lens without red-eye. For many other countries, open eyes remain strictly mandatory regardless of age.
Does the background need to be pure white? It depends strictly on the jurisdiction. The UK requires a plain cream or light grey background, whereas US and Schengen rules mandate plain white. Check the specific national guidelines before capturing the image to ensure the underlying sheet matches the requirement.
Why did my digital file pass the automated checker but fail during manual review? Automated upload portals generally check baseline file parameters like pixel count, file format, and rough facial detection. They do not reliably verify subtle compliance issues like glare on the skin, background texture, or micro-blur, which human officers catch later in the process. Relying on the basic upload checker does not guarantee compliance.
How current must the photo be for a new application? Government agencies universally require passport and visa photographs to have been taken within the last 30 days. Supplying older images, even if they accurately reflect the child's appearance, violates the submission criteria.