Mastering UK Passport Photo Requirements for Infants and Children in 2026
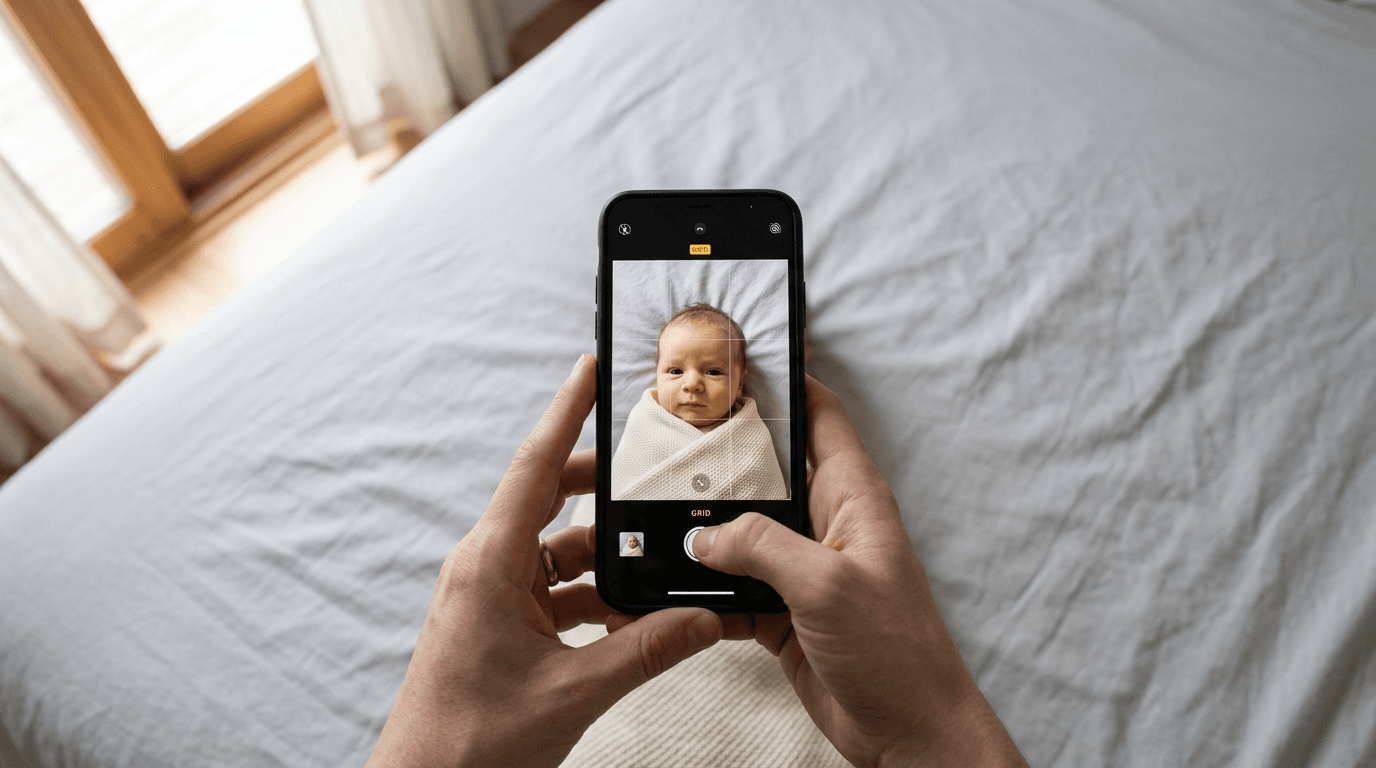
You are standing over a light grey bedsheet, holding a smartphone above a wriggling infant, trying desperately to capture a neutral expression before they start to cry. This is the exact moment most applicants realise that meeting standard uk passport photo requirements is far more complex than snapping a quick portrait. The HM Passport Office processes millions of applications annually, and automated biometric scanning software immediately rejects submissions for micro-shadows, incorrect head tilts, or background textures invisible to the naked eye. Relying on guesswork rather than exact dimensional parameters guarantees a delayed application. Mastering this process requires understanding exactly how compliance algorithms read a digital file, why physical proximity ruins proportions, and which specific failure points you must engineer out of your setup before you ever press the shutter.
Quick Summary
A compliant UK passport photo is a tightly regulated biometric record requiring precise dimensional scaling, flat illumination, and specific background conditions. Achieving compliance demands strict adherence to formatting rules rather than photographic aesthetics, ensuring automated systems can map facial landmarks accurately.
- Digital submissions must be at least 600 by 750 pixels.
- Physical prints require a strict 45x35mm dimension.
- Backgrounds must be plain light grey or cream, never white.
- Infants under one are exempt from open-eye rules.
- Shadows on the face or background are the leading cause of rejection.
Table of Contents
- 1. Master the lighting environment
- 2. Lock in the precise dimensions and distance
- 3. Control facial expressions and body positioning
- 4. Isolate the subject against a compliant backdrop
- Common Pitfalls & Troubleshooting
- FAQ
- Recommended Reads
1. Master the lighting environment
Why uneven illumination triggers digital rejection
HM Passport Office biometric systems do not view lighting as an aesthetic choice; they read it as topological data. When automated software scans a photo, it measures the distance between facial landmarks like the pupils, the bridge of the nose, and the jawline. If a harsh shadow falls across one side of the face, the algorithm registers that dark patch as a physical obstruction or an asymmetrical facial feature, immediately failing the image. This strict validation means that mastering illumination is the single most critical step in capturing a compliant document photo.
The mechanics of correct lighting rely entirely on flat, diffuse sources. You must eliminate all directional light that creates contrast. If you are taking the photograph at home, position the subject facing a large window during daylight hours, ensuring the light hits them directly head-on rather than from an angle. Turn off overhead room lights; artificial bulbs positioned above the subject cast heavy shadows under the eyebrows, nose, and chin, which invariably fail the biometric scan. For families navigating different international standards, checking comprehensive guides on international baby passport photo requirements can clarify how universally unforgiving these lighting rules are across borders.
The mistake most applicants make is relying on the smartphone camera's flash to compensate for a dim room. A direct flash creates a harsh, stark highlight on the forehead and cheeks, often resulting in red-eye or unwanted glare on the skin. Furthermore, flash photography typically projects a distinct, sharp shadow onto the background directly behind the subject's head. UK passport digital photo requirements mandate a completely uniform backdrop devoid of any shadows. A flash virtually guarantees a rejection. Increase the ambient light instead. Open all curtains. Use white reflectors, such as a piece of poster board, held just out of frame to bounce soft daylight back onto the unlit side of the subject's face.
2. Lock in the precise dimensions and distance
How getting too close breaks biometric scaling
Biometric scaling relies on strict geometric proportions that cannot be fixed if the original capture is optically distorted. When setting up the camera, the physical distance between the lens and the subject dictates how the facial features render. Smartphone lenses are typically wide-angle, meaning they bulge subjects that are positioned too close to the glass. If you stand half a metre away, the subject's nose will appear artificially enlarged relative to their ears, altering the very facial landmarks the passport office relies on to verify identity.
The core mechanics involve enforcing strict distancing and adhering to specific sizing outputs. The camera must remain at least 1.5 metres away from the subject. From this distance, you capture the head, shoulders, and upper torso, leaving ample negative space around the subject. This wide framing allows you, or the biometric software you use, to crop the image down to the precise uk passport photo size without degrading the resolution. For printed applications, the final photograph must measure exactly 45 millimetres high by 35 millimetres wide. Within that physical frame, the subject's head, measured from the crown to the point of the chin, must occupy between 29 and 34 millimetres.
Practical rule: Never crop the photo in your camera app while taking the shot; always capture a wider frame at the highest resolution and apply the exact 45x35mm crop in dedicated formatting software afterwards.
The fatal error many applicants commit is pinching their smartphone screen to zoom in before taking the picture. Digital zoom destroys pixel density. The HM Passport Office requires digital files to be at least 600 pixels wide and 750 pixels tall, with a file size sitting between 50KB and 10MB. Pinching to zoom lowers the effective resolution, resulting in pixelated edges around the hair and jawline. When the validation system detects this blur, it flags the file for low quality. Always shoot at a standard focal length, maintain the 1.5-metre distance, and handle all resizing during the digital export phase.
3. Control facial expressions and body positioning
Where infant exceptions differ from standard adult rules
The rigidity of british passport photo requirements stems from the need to standardise facial geometry. An open mouth, a wide smile, or squinting eyes stretch the facial muscles, moving the key biometric markers out of their resting positions. For adults and older children, this means adopting a completely neutral expression: mouth closed, eyes open and looking straight at the lens, with no hair obscuring the eyebrows or the edges of the face. However, applying these exact standards to a newborn is practically impossible, which is why the passport office has built-in exceptions for younger applicants.
The mechanics of positioning depend entirely on the applicant's age. For subjects over the age of six, the neutral expression is mandatory. For children aged one to five, they must be looking forward, but the system permits a slightly relaxed expression. For infants under one year old, the rules relax significantly: their eyes can be closed, and they do not need to be looking directly at the camera. If you find these age-based nuances confusing, consulting a dedicated passport photo help centre can provide clarity on what exactly constitutes a passable expression for a toddler.
The most frequent mistake parents make when photographing infants is leaving their own hands in the frame. While it is tempting to hold a baby's head steady or support their shoulders, the inclusion of a parent's hand, arm, or even a piece of clothing will result in an immediate automated failure. The subject must appear entirely alone. If the infant cannot sit up unsupported, lay them on their back on a plain background, or drape a compliant grey sheet over a car seat and strap them in beneath the cloth. Ensure no dummies, toys, or headbands are visible, as these read as foreign objects to the biometric scanner.
4. Isolate the subject against a compliant backdrop
What background textures cause immediate system flags
Background compliance is the least understood aspect of digital applications, yet it accounts for a massive percentage of automated rejections. The validation software does not merely look at the colour; it scans the background for total uniformity. Any variation in pixel density behind the subject, caused by wrinkles, fabric weave, wood grain, or patterned wallpaper, is interpreted as a physical object in the background. The rules strictly dictate a plain, uniform surface, meaning your backdrop must be entirely smooth and free of any textural gradient.
The specific mechanics of background selection require strict adherence to a very narrow colour palette. You must use a plain light grey or plain cream background. A stark, pure white background is forbidden because it often causes the edges of a pale subject's face or light-coloured hair to blend into the backdrop, a digital phenomenon known as clipping. When the software cannot distinguish where the hair ends and the background begins, it fails the image. Furthermore, if you are relying on automated tools to strip and replace the background, it is vital to ensure you are reviewing the specifics of a 100% refund policy for rejected submissions, as poorly coded algorithms often leave jagged, artificial edges that the passport office will spot and reject.
A routine mistake is laying an infant on a heavily textured blanket or a wrinkled bedsheet. To the human eye, a white cotton sheet looks relatively plain. To an algorithmic scanner analysing a high-resolution file, the folds and creases cast micro-shadows that break the required uniformity. To fix this, pull the fabric completely taut and secure the corners to eliminate all wrinkles. Alternatively, use a large, smooth sheet of light grey matte cardstock. Do not use glossy materials, as they reflect ambient light back into the camera lens, creating bright spots that the system reads as non-uniform colour patches.
Common Pitfalls & Troubleshooting
Even with strict adherence to sizing and lighting rules, the HM Passport Office's automated checks frequently flag submissions for seemingly minor infractions. These issues often look identical at a glance but stem from entirely different root causes. Here is how to diagnose and resolve the most common failures before submitting your final application.
Asymmetrical Facial Shadows
- Symptom: The validation portal warns that lighting on the face is not even, or one ear appears significantly darker than the other.
- Diagnosis: This occurs when your primary light source is hitting the subject from the side rather than head-on. The software interprets the dark half of the face as missing biometric data.
- Fix: Physically rotate the subject so they are facing squarely into the light source. If standing by a window, their nose should point directly at the glass. If shadows persist on the neck, ask the subject to lift their chin a fraction of an inch to flatten the lighting across the jawline. This is the most frequent real cause of rejection.
Digital Pixelation and Low Resolution
- Symptom: The uploaded file is flagged for being blurry, out of focus, or the file size drops below the 50KB minimum threshold.
- Diagnosis: The camera lens was either dirty, or the image was heavily compressed when sent between devices.
- Fix: Clean the camera lens with a microfibre cloth before shooting. Never use a digital zoom when capturing the image. Transfer the file from your phone to your computer via email using the actual size setting, or use a direct cable connection. Ensure the final crop remains above the 600 by 750-pixel minimum.
Background Bleed and Edge Clipping
- Symptom: The subject's hair or shoulders seem to disappear into the backdrop, triggering an outline not clear error.
- Diagnosis: The subject is standing too close to the backdrop, allowing shadows to merge with dark clothing or hair, or the background colour is too similar to the subject's features.
- Fix: Move the subject at least 50 centimetres away from the background wall. This separation prevents the subject from casting a harsh drop-shadow immediately behind them and helps the camera lens differentiate between the edge of the subject and the wall.
Red-Eye and Pupil Obscuration
- Symptom: White or red spots appear over the subject's pupils, causing a biometric mapping failure.
- Diagnosis: This is caused exclusively by using a direct flash, which reflects off the retina back into the lens.
- Fix: Disable your smartphone's flash entirely. Rely solely on diffuse natural daylight. By understanding the background of UK baby passport photo makers and digital processing tools, you will learn that altering facial features algorithmically to remove red-eye always triggers a rejection, meaning you must get the lighting right in the camera.
FAQ
Can a child wear glasses in their UK passport photo? No, glasses should be completely removed. While the official guidance technically permits glasses if they do not cause glare or obscure the eyes, in practice, the frames invariably cast micro-shadows or obscure part of the eyebrow. Removing them entirely is the only way to guarantee the biometric scan will not fail due to frame obstruction.
What are the exact pixel dimensions required for a digital upload? A digital passport photo must be a minimum of 600 pixels wide by 750 pixels tall. The file must be saved in JPG or JPEG format, and the total file size must sit between a minimum of 50KB and a maximum of 10MB.
Do babies need to have their eyes open for the photograph? If the infant is under one year old, their eyes do not need to be open. For children aged one and older, the eyes must be clearly visible and open. However, children under six are exempt from the strict neutral expression requirement and do not need to be looking perfectly straight at the camera.
Can I scan a physical photo to use for a digital passport application? No. You cannot use a scanned copy of a printed photograph for a digital application. Scanners introduce digital artefacts, moiré patterns, and contrast alterations that the biometric software will detect as tampering. A digital application requires an original digital file captured directly from a camera. Ensure you are reviewing the privacy policy for handling biometric data if you use online tools to prepare this digital file.